FAQ > Managing Vendors
|
1. What is the vendor page for?The vendor page allows you to manage your vendor information. You would use it if, for example, you had a vendor that you wanted to track in terms of how much you have paid or owe this vendor across all the properties where you do business. The vendor page will allow you to manage vendor-related information such as:
You can access this page by clicking on the ‘Vendors’ link at the top of the page. |
2. Do I have to use the vendor page?No, this is entirely optional. However, it is very useful for property managers who have multiple vendors for each property. The Vendor page helps property managers keep track of vendor payments for each property. It’s also useful if you need to generate 1099 for a vendor. |
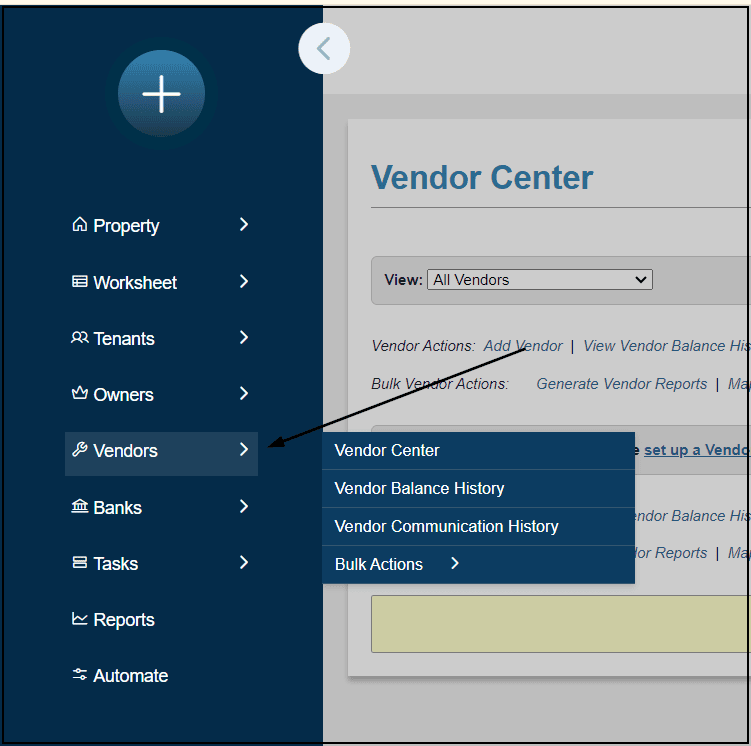
3. How can I add vendor information to SimplifyEm.com Property Management Software?Property managers can add multiple vendors for each property. To add vendor information for each vendor, do the following: 1. Go to the vendor page by clicking on the ‘Vendors’ link on the left of the page.
2. You will arrive at the Vendor Center page. 3. Click on the ‘Add Vendor’ link to add new vendor information.
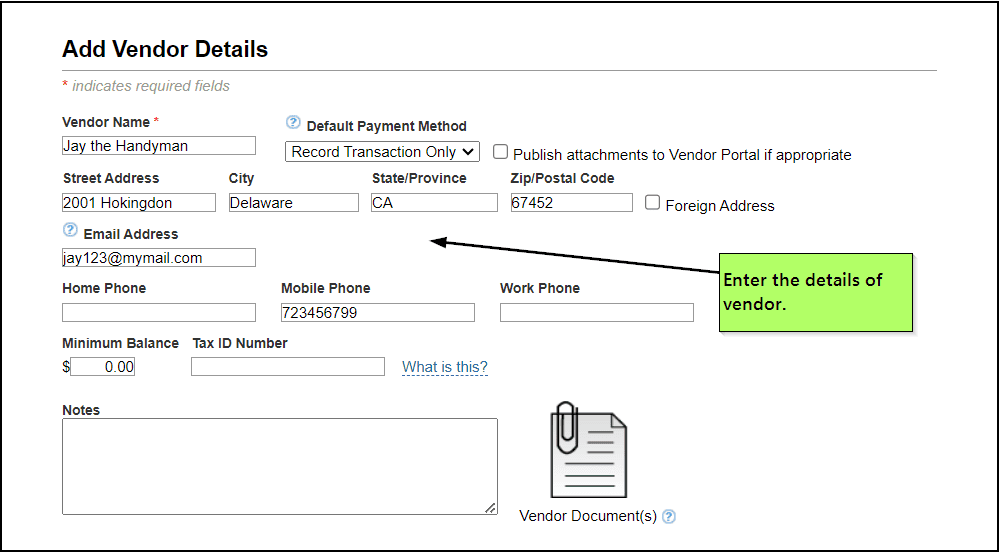
4. You will arrive at the ‘add vendor details’ page. Enter all the vendor information and click the ‘Save’ button.
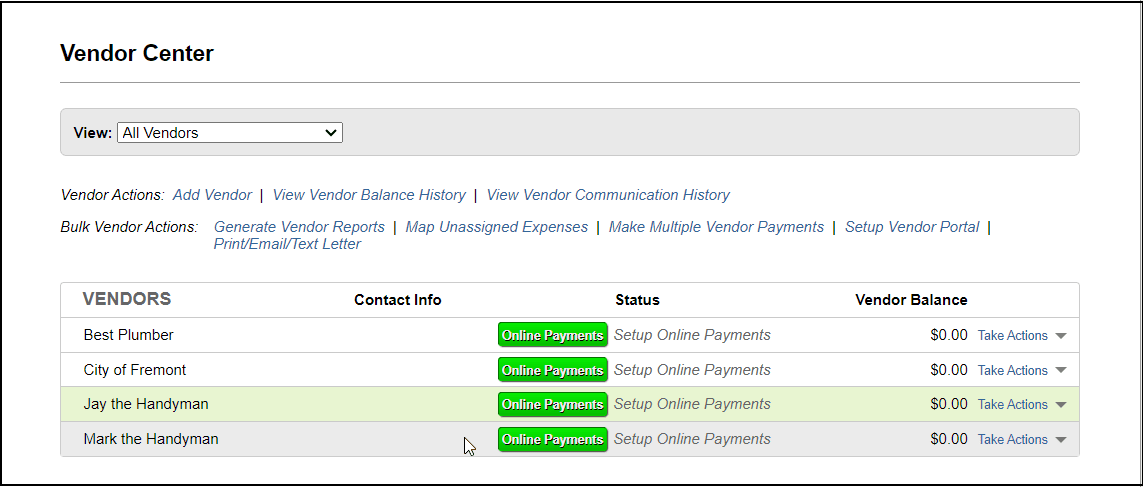
5. You will arrive at the ‘vendor center’ page again. Here you can see the newly added vendor information.
|
4. How is a Vendor’s opening balance recorded?The property manager records a vendor opening balance in SimplifyEm.com Property Management Software if they owe some pending balance to vendors from their last expense transaction. Here are the steps to record vendor opening balance: 1. Go to the vendor center by clicking on the ‘Vendors’ tab at the top of the page.
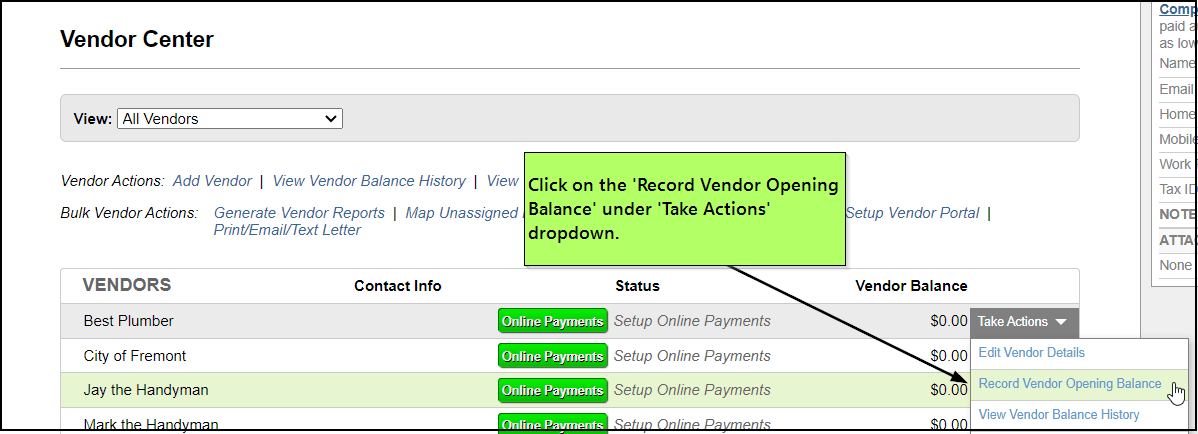
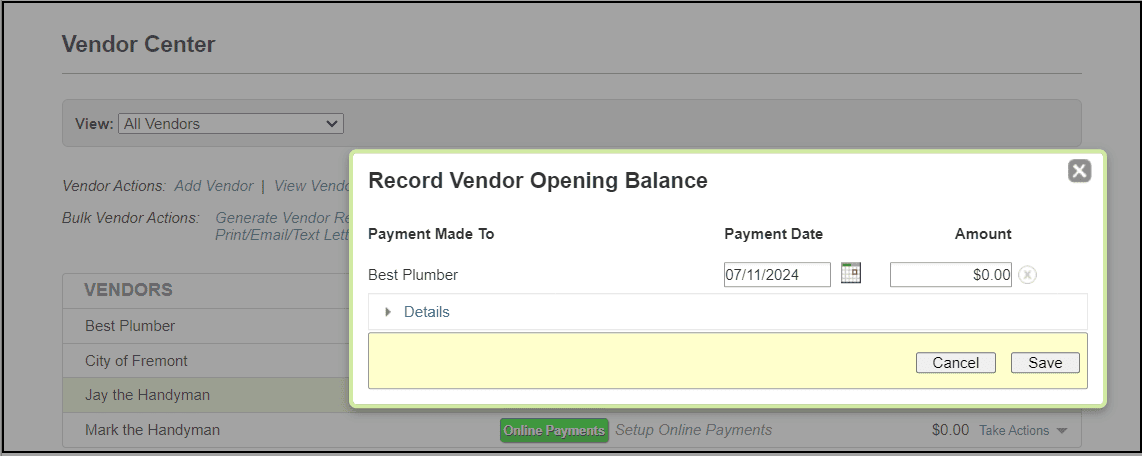
2. Hover over ‘Take Actions’ for the corresponding vendor’s row and click ‘Record Vendor Opening Balance’ from the dropdown list.
3. Record vendor opening balance popup appears. 4. Enter the vendor opening balance amount in the amount field and select the date to record the vendor opening balance.
5. Click the ‘Save’ button. 6. Vendor opening balance has been recorded on the vendor balance history page for the corresponding month. |
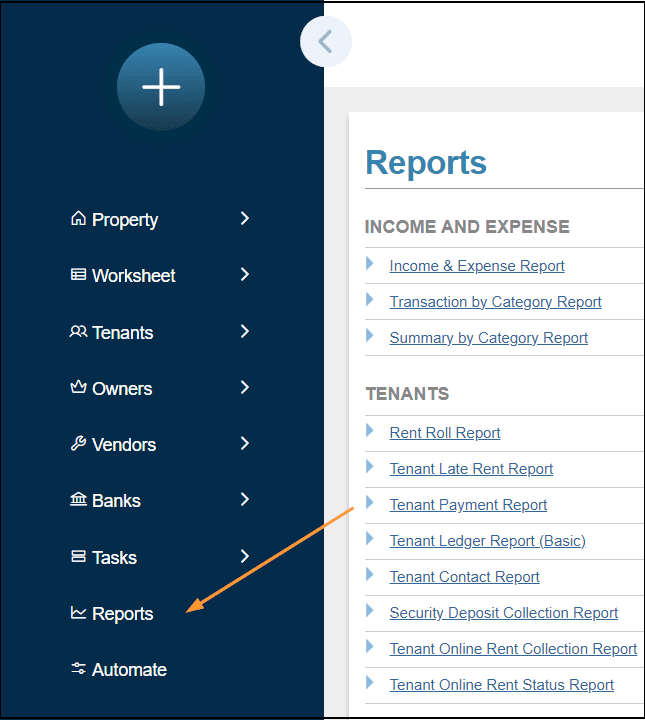
5. How can I generate a list of all my vendors and their contact information?SimplifyEm.com Property Management Software allows you to generate a report with a list of all your vendors and their contact information. To do this: 1. Go to the ‘Reports’ page. 2. Scroll down to the ‘Vendors’ section on the page, expand the ‘Vendor Contact Report’ section and click on the ‘Generate’ button. The generated report will show you a list of all your vendors and their contact information.
|
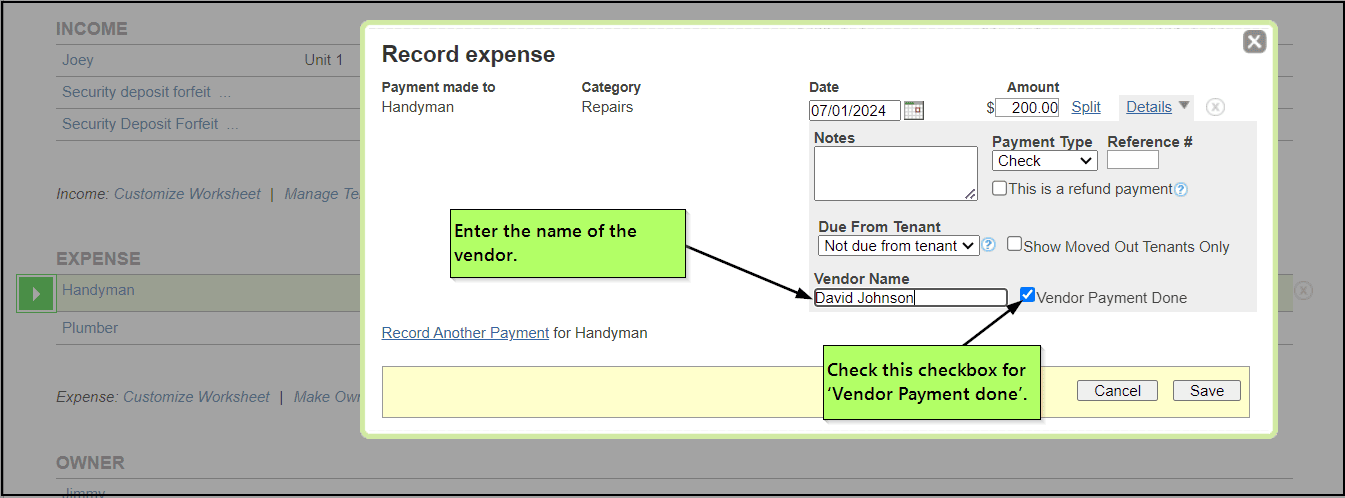
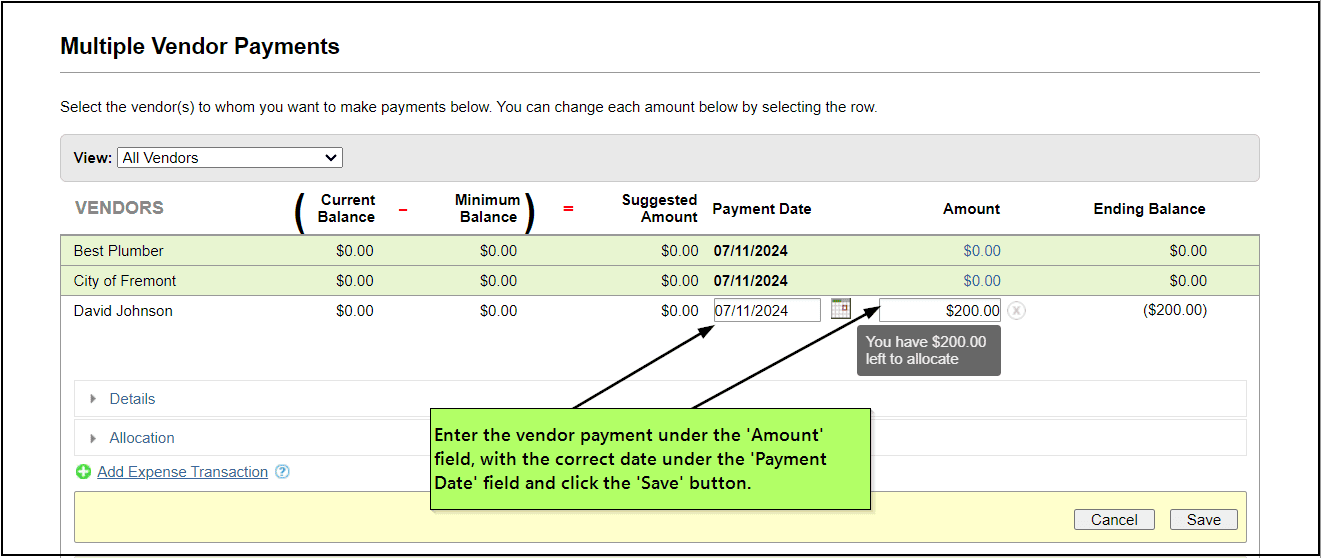
6. I pay my vendors at the same time that I input my expenses into SimplifyEm.com Property
|
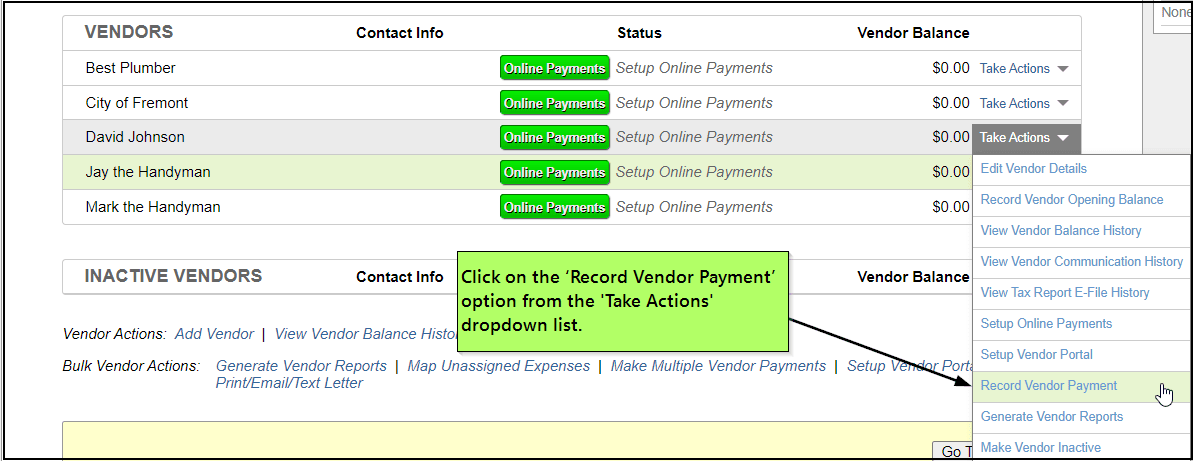
7. How to Create/Update/Delete Vendor Payments?To use Record Vendor Payment, it’s necessary to create/update and delete the vendor payment. 1. Steps to Create Vendor payment:
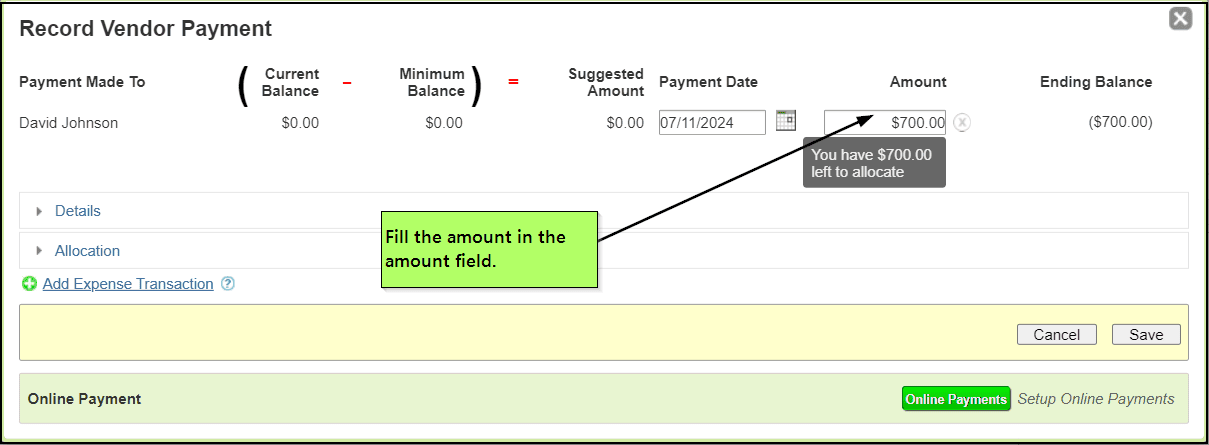
Select ‘Record vendor payment’
Fill the amount in the amount field, and the amount will be auto-allocated within the property. Select save. 2. Steps to Update Vendor Payment.
Select the vendor payment that needs to be updated.
Change the amount or update the amount and select save. 3. Steps to Delete the vendor payment.
Select the vendor payment
Click the close button next to the amount, a dialog will appear.
Select “OK” to delete the Vendor Payment transaction |
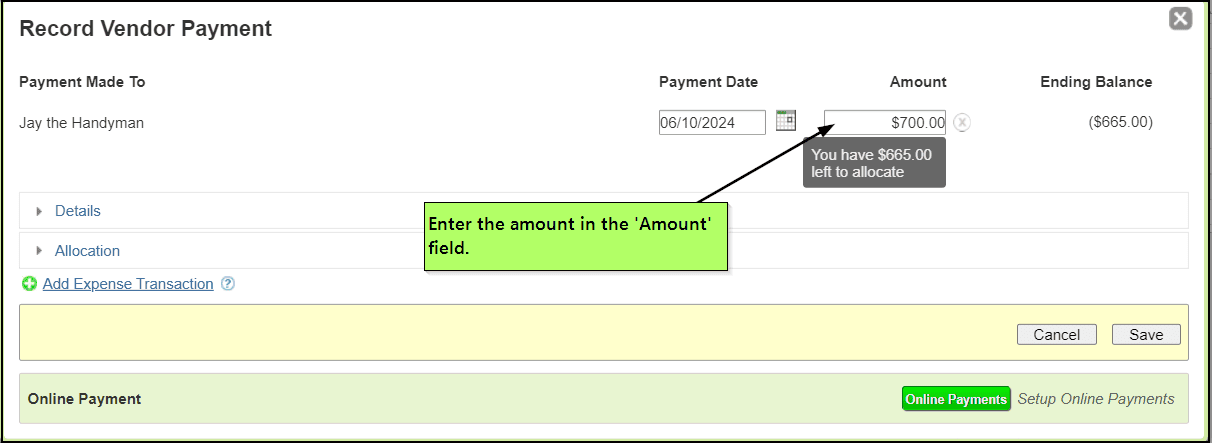
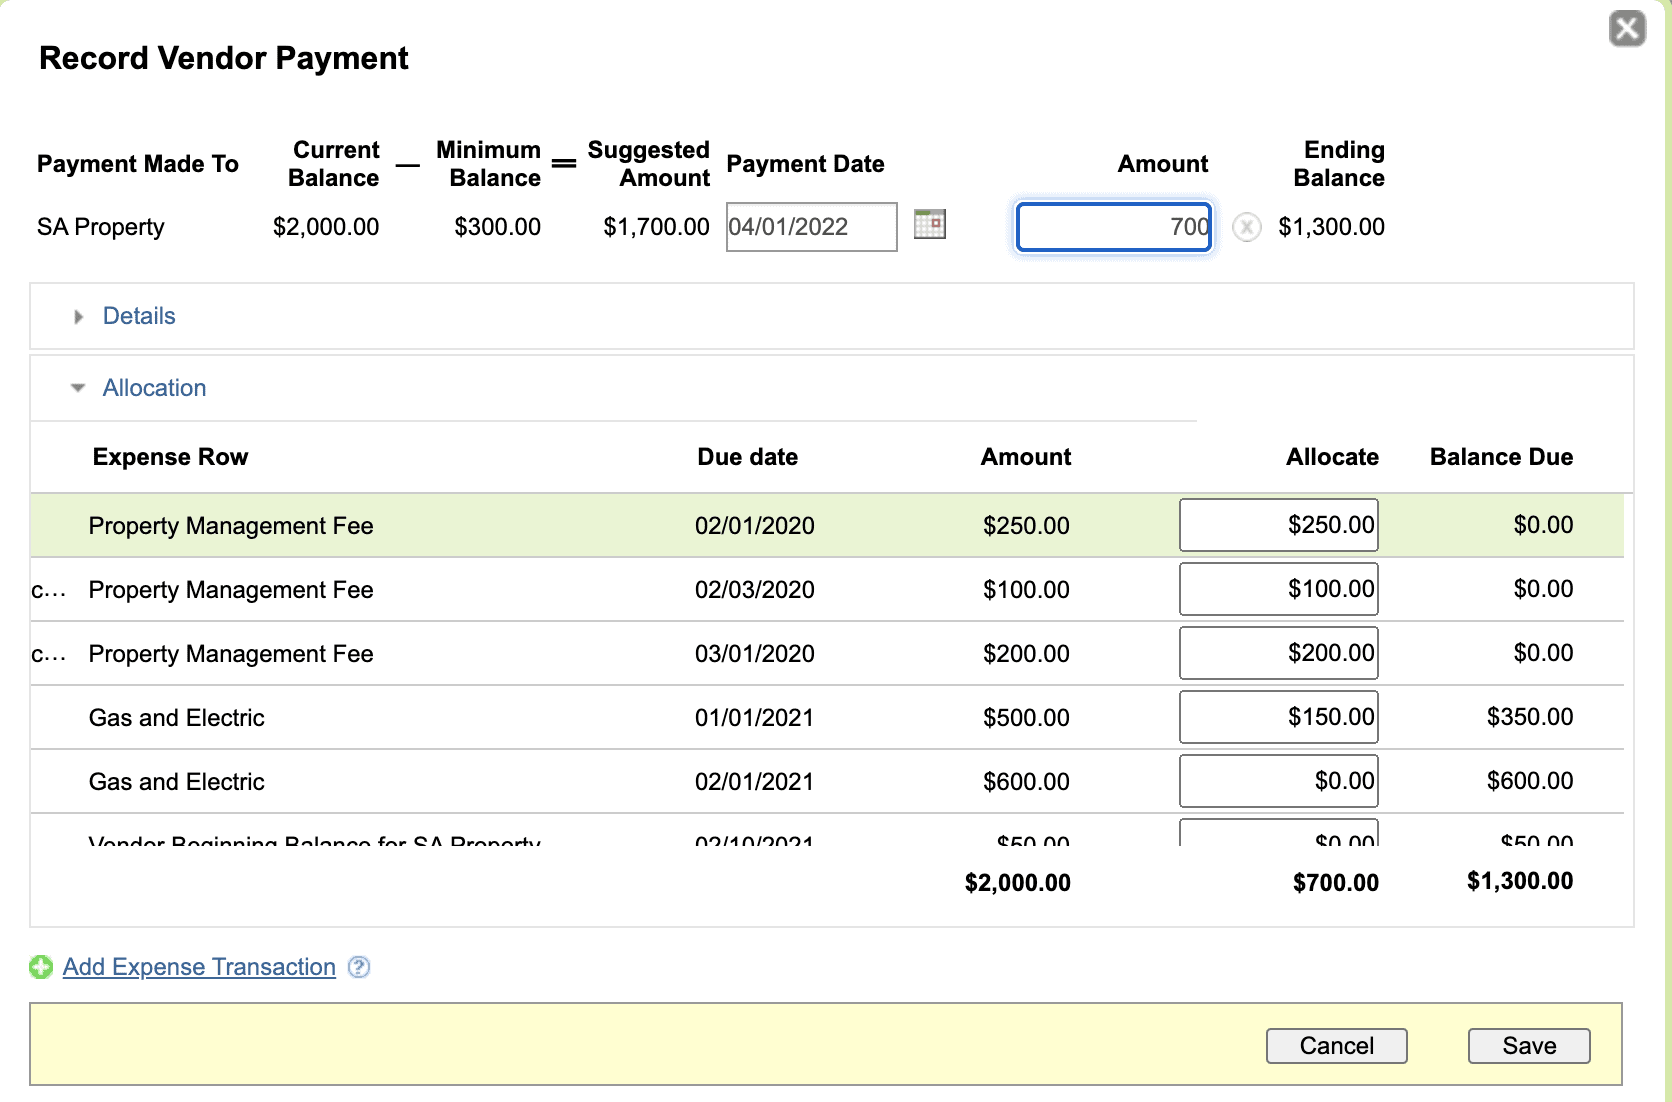
8. How does the Auto Allocation work in Vendor Payment?Auto allocation in record vendor payment is simple. When a vendor payment is made by selecting ‘Record vendor payment’,
Then a dialog box opens with Vendor Payment
The amount is added and will be Auto Allocated to the expenses in chronological order. |
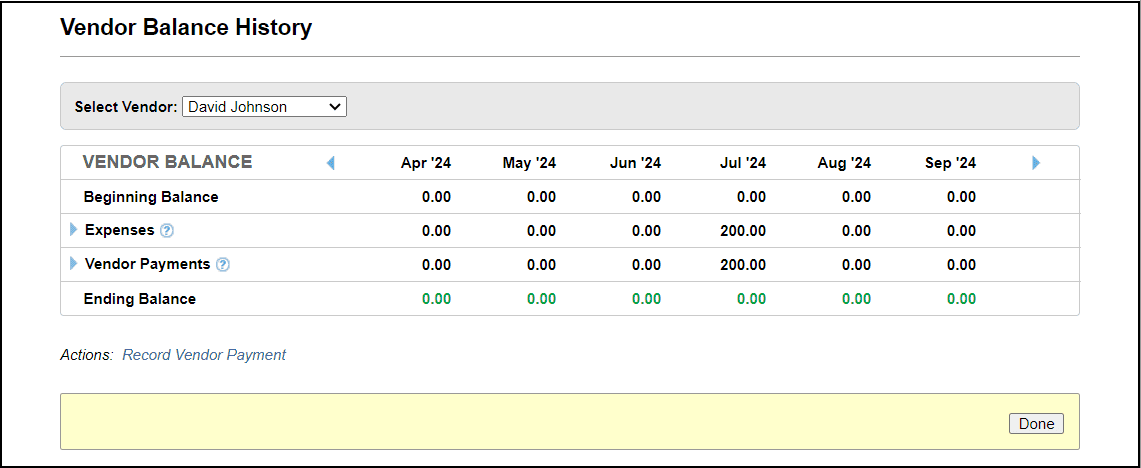
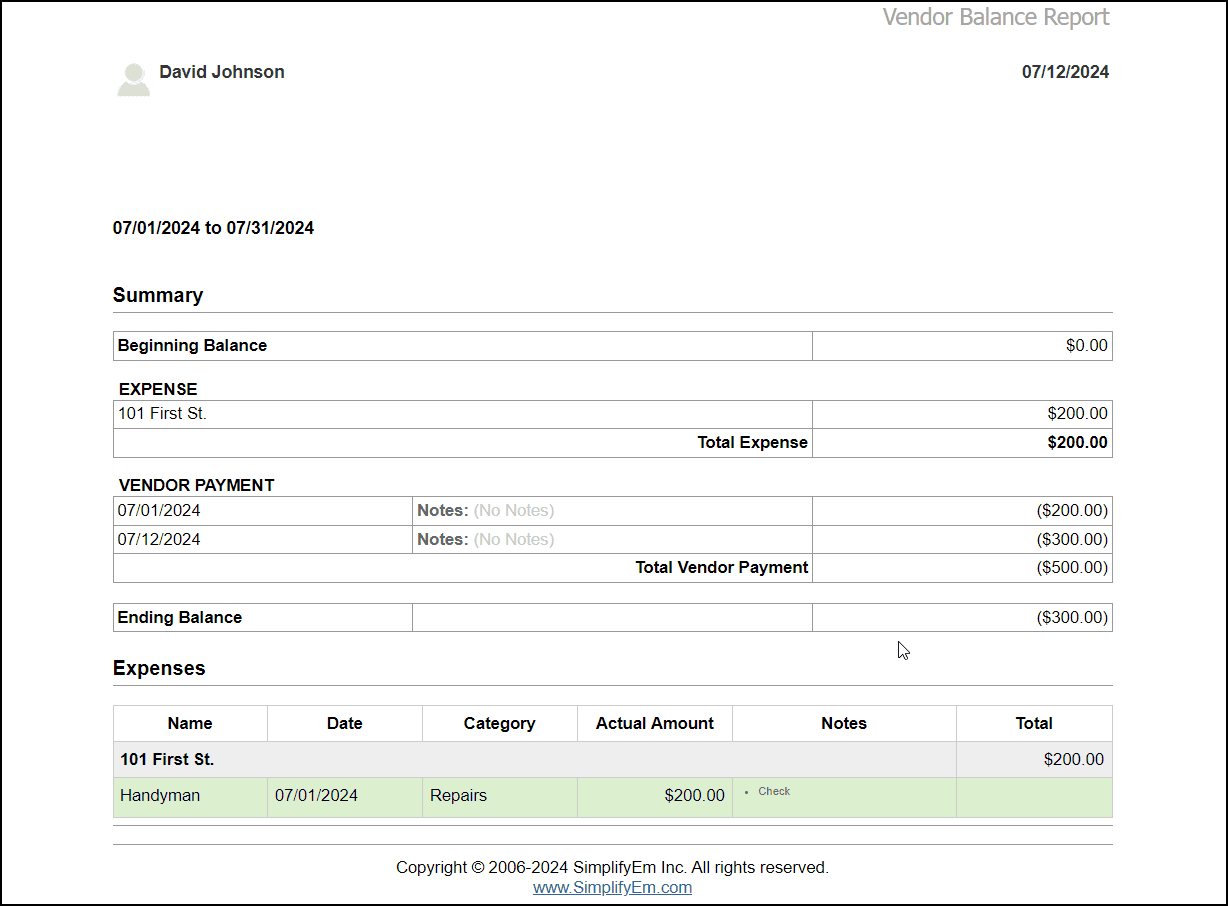
9. How can I generate Vendor Balance Reports?SimplifyEm.com gives you access to ‘Vendor Balance Reports’ for all your vendors. These reports have the
You can print the ‘Vendor Balance Report’ for individual, or all, vendors. You can generate a Vendor 1. Go to the reports page by clicking on the ‘Reports’ link at the top of the page.
2. Scroll down to the ‘Vendors’ section. Expand ‘Vendor Balance Report’ and select the Vendor
3. The Vendor Balance Report will be shown in a separate window or tab, as follows:
|

