FAQ > Data Entry On The Worksheet
How can I add notes to a transaction? Where do these notes show up?
How to Add Notes to a Transaction:
To add notes to a transaction, follow these steps:
- Go to the Property Worksheet: Begin by accessing the property worksheet where the transaction is recorded.
- Select the Property and Tenant: Once you are in the worksheet, select the appropriate property and tenant for which the transaction is associated. This ensures you’re working with the correct set of records.
- Locate the Transaction: Navigate through the list of transactions to find the specific transaction to which you want to add notes.
- Click the “Edit Transaction” Icon: Next to the transaction entry, look for the “Edit Transaction” icon, typically represented by a pencil or an edit symbol. Clicking this icon will open a new window displaying the transaction details.
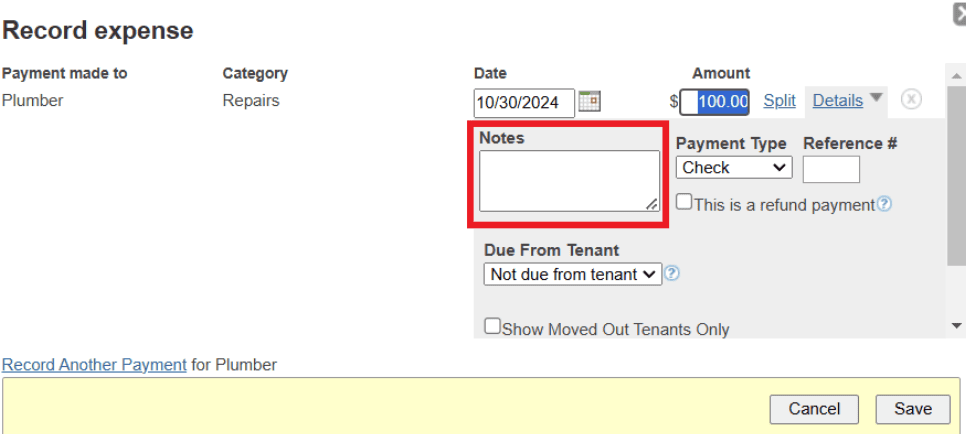
- Click on Details: This is an option to expand the transaction details.
- Enter Notes: In the transaction details window, you will have the opportunity to modify the amount, date, and other fields. Locate the section specifically for adding notes or additional details. Here, you can enter any relevant comments or information about the transaction.
- Save the Changes: Once you have added the notes, make sure to save your changes by clicking the “Save” or “Update” button at the bottom of the form. Failing to save the changes will result in the notes not being applied to the transaction.
- View Notes in Reports: The notes you add will be saved along with the transaction. These notes will appear in your Income and Expense Report, providing additional context for the transaction. This report gives a detailed view of your transactions, with the notes displayed alongside each relevant entry for future reference.


By following these steps, you can easily add notes to any transaction and ensure they are properly recorded and visible in reports.

